Tuesday, July 21, 2015

Please, Fence Me In


I have a confession: I lied in a previous post where I wrote about my yard.  I had just painted the picket fence around my house in order to qualify for a mortgage refinance.  In my post, I claimed that with this beautiful, newly-painted fence, I had to landscape my yard.

The lie?  In reality, I hated my fence.  Withered, weathered, and rotted out, my fence was falling down in so many places that I had to hold it up with wire and duct tape.  The whole thing made me wince every time I left the house or came home, and I figured my neighbors were probably just as annoyed.  I wouldn't let my little dogs outside because there were so many gaps they could escape through.  

So this summer I finally made the decision to replace this abomination.  After some research in a community social networking group, I found a wonderful, reliable fence guy, Gary Ambrose.  He came to give me an estimate, and we chatted as he took measurements and sized up my yard.  The more he talked, the more relaxed I felt. Then I realized a few things about the home construction project.


Get a specialist.  Now let me say that Gary is strictly a fence guy, and he's been doing it for decades.  He talked about fences the way I like to talk about Star Wars or Mexican food.  And he made it interesting, too.  Previously, a few handy-men had offered to replace my fence (such an eyesore, strangers passing on the street always made disparaging comments).  But none of them were fence guys.  I'm so glad I went with someone who specializes in fences and knows the ins and outs.


Think forward.  My previous fence posts were rotted out, so instead of using wooden posts, I asked Gary to install steel posts.  I want this fence to last for as long as I live in this house, and beyond that.  I wasn't sure how it would look, but it's beautiful.  


Be clear about what you want.  Okay, I wasn't sure what I wanted until Gary gave me choices. Eventually, though, I came to make decisions on the type of wood, height, and style.  Ultimately, I wanted something practical but attractive.  We went with redwood with dog-eared tops.  I am treating the wood with a clear sealant so it won't turn gray but keeps the wood color.  It's more organic and has a beautiful redwood tone.

The project took only a few days.  Demolition was pretty fast because, heck, most of the fence was falling over anyway.  Without the old, rotting picket fence, my house felt exposed. 

Poor, sad little yard. Needs a fence, no?

 Then Gary and his crew came in and waved their magic wands.  Okay, not really, but that's how it felt because anything like this is like magic to me.


  They installed two gates within the fence.  

Can you find the gate? No? It's hidden! Wow!

And it's BEAUTIFUL!  The fence is high enough to give us a little privacy but low enough that we can check out what's going on in the world out there.  The side fence by the driveway has a gate, but it is cleverly camouflaged into the rest of the fence.  It's awesome.  With a couple of park benches, we have a wonderful place to hang out in the yard. Everybody compliments me on the new fence--my next door neighbor even sent me congratulatory email!  

It's our own personal park.

The dogs love it too.

So there we go.  Now when I drive up to my house, I am no longer embarrassed by my sad little yard. Now I am proud of my gorgeous redwood fence. 

If you live in the Los Angeles area and need some fence work done, I do recommend Gary Ambrose. He did a fine job, it's beautiful, and it has changed the whole look of my house.  Thank you, Gary!  

Sunday, May 10, 2015

Snaggletooth Gets an Undercoat


In an earlier post, I showed how I constructed little baby Snaggletooth the dragon.  I shipped him off to Gint, a talented painter of miniature models.  So far, Gint has put on Snaggle's base coat.   What a big difference a coat makes!


I can hardly wait until the little guy is finished.  Updates with the next round of paint!  Thanks, Gint!

Sunday, February 1, 2015

Makin' a Dragon: Snaggletooth


I'm making a dragon.  That's right.  Making one.  A dragon.

Last December a friend posted a video on Facebook of an artist creating a paper mache dragon.  The artist is Dan Reeder, and his video went viral. I watched his videos over and over, bought one of his books, and even emailed him for help. (He responded!  What a cool guy...).

You can make a dragon too! Check out Dan's website and blog so you can see the whole process in a lot more detail.  While you're at it, buy one of his books.  It's really important to support artists...

Now I'm going to show you how my little dragon is progressing.    Originally I made the parts for a large dragon, but I wanted to try out some of the methods on a smaller dragon.  So here he is...Snaggletooth.


First I made the body parts.  The parts shown in the pictures are actually for a much larger dragon, but I made smaller versions to make Snaggle.  I crumpled newspaper and wrapped it with masking tape.  Then I added strips of newspaper with a mix of flour and water.  If you want the detailed instructions, check out Dan's website and Youtube channel. But do follow his two golden rules:  (1) one sheet of newspaper at a time, and (2) flour/water mixture goes on your hands, not on the paper itself. If you have ever used the paper mache method, you will know how yucky the flour paste gets, and it destroys the integrity of the newspaper.  This is all fixed if you put your hands in the paste instead of the newspaper.  Trust me!


Next assemble the parts by adding the head and legs.  I cut holes into the body section and attached everything with masking tape.


Then I added the arms and "fingers."  To this, I draped pieces of bedsheets dipped in a bath of glue to form the wings.  It took a while to get the wings to hang the way I wanted but well worth the time.


That's Dan Reeder's book on the chair behind Snaggle.  I've gone through that book so much it's covered in glue and flour paste.


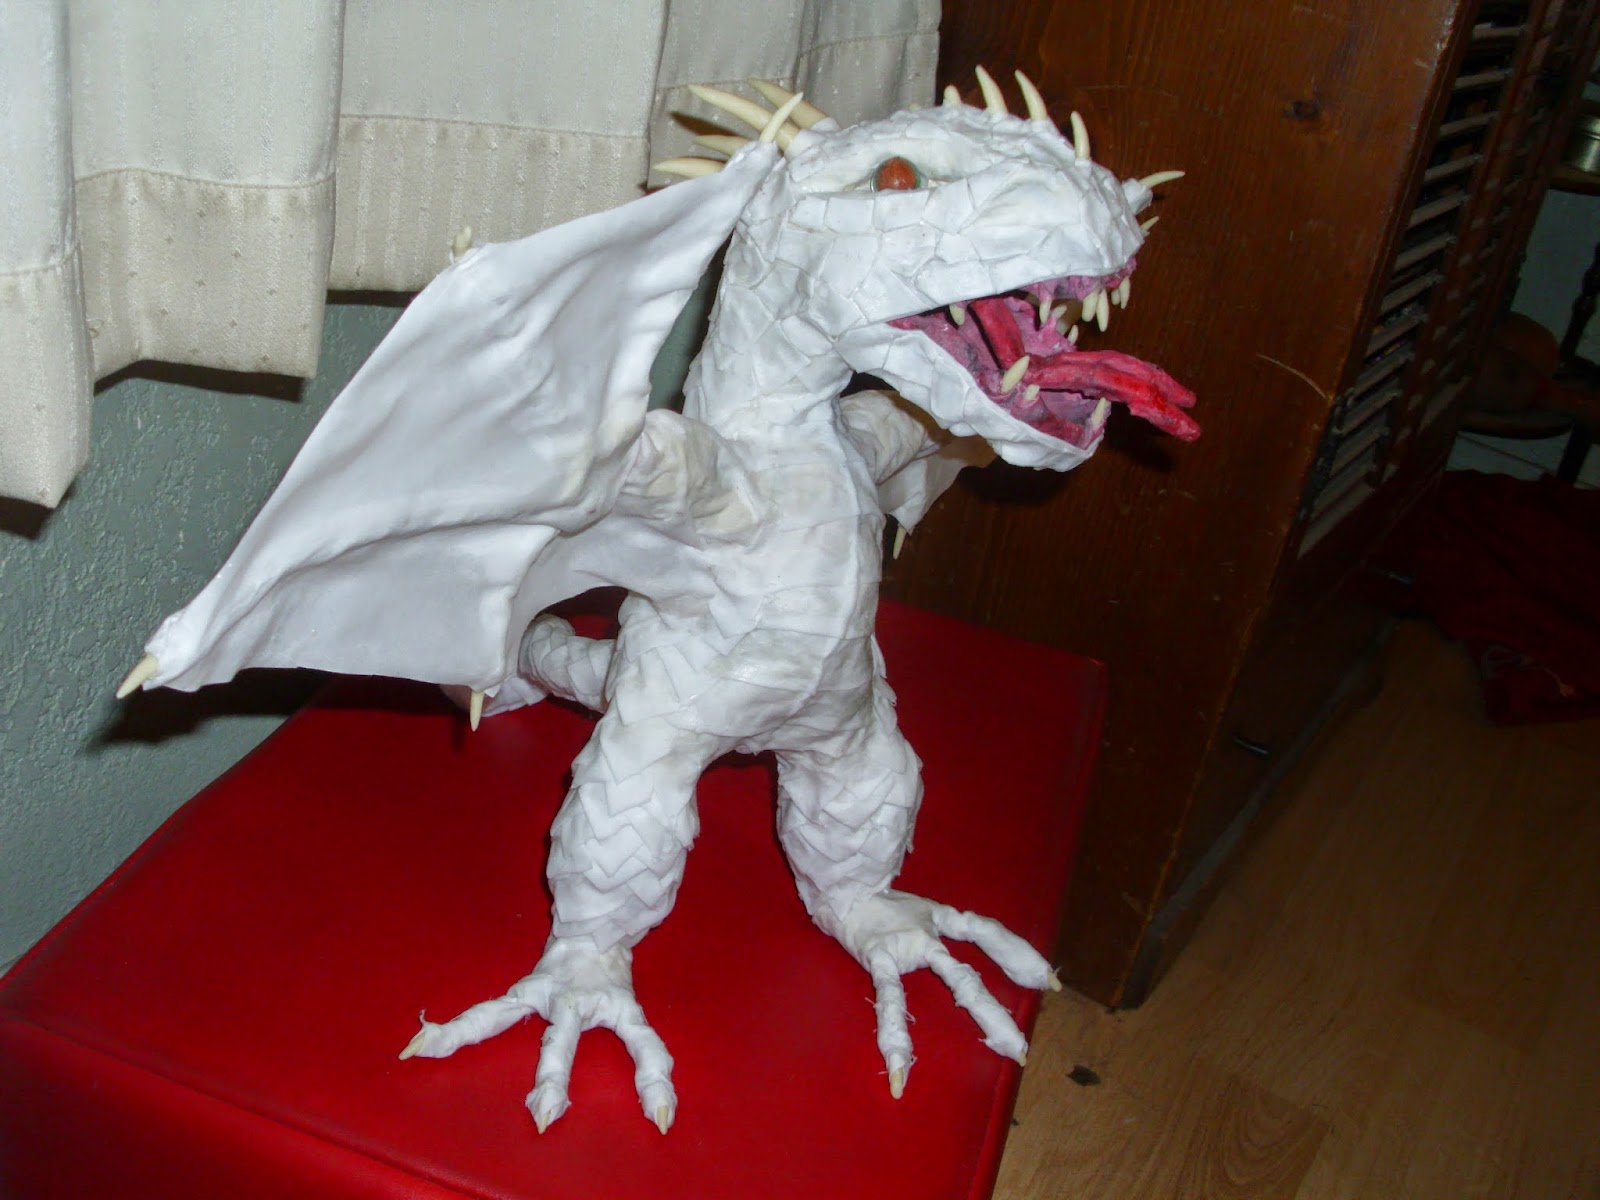
To the head I added horns and eyes.  The eyes are matching marbles.  Isn't he cute?


Then I added cheeks and an eyebrow ridge.


For the horns, I used Fimo clay, the glow-in-the-dark color.  This color is perfect for an off-white look, also recommended by Dan.  Just do everything he says and your dragon will look cool.  He's been doing this for decades.


I added breastplates starting from the tip of the tail and working up to the neck.

For the legs and top of the tail, I added triangular scales.  The scales transitioned to a different kind of scale at the head. 


I removed the tongue for the entire process and added back for pictures.  I'll leave it out for the painting stage and add it back when everything is finished.


A few more pictures, with and without the tongue.  The natural lighting really shows off his wings.


Now Snaggletooth is ready to paint!


And I can't say this enough.  I am indebted to Dan Reeder, the gourmet paper mache guru and Monster Man, whose work inspired me.  Thanks, Dan!  

Post script:  Here's an update on Snaggletooth's paint job.  He's looking great so far!